COSP: Constant Optimising Software Package
1. What is COSP
COSP comprises a set of subroutines attached to PHOENICS for the purpose of solving so-called "inverse problems", such as:
2. How COSP works
COSP has been evaluated through worked examples and also applied to the tobacco industry for the filter design.
3. What are the input files required to run COSP ?
In order to run COSP, users need the following files:
3.1 Q1 file
The q1 file is used for the user to set up the all the input date for the numerical simulation of the experiments. These settings include geometry, properties and boundary conditions as well as numerical settings.
The multi-run facility is required for running COSP and it can be set by RUN(1, …), the second command (after TALK=F) on the first effective line of the Q1 file. For example, for 5 runs, the user should set
TALK=F; RUN(1,5)
then the user should also provide 5 sets of statements corresponding to experimental conditions with a STOP statement at the end of each set of statements. Thus, RUN(1,5) will cause SATELLITE to read the 5 sets of statements.
In-Form is used to specify, in the q1 file, the expression where the unknown constants, which is to be searched by COSP, appear.
3.2 Data files for setting up the investigated system
Apart from setting all the input data into the q1 file, the user may specify the input data in separate data files and utilise PIL command INTRPT(R, PATH/file-name) to read in these data. These data files can contain any information for the CFD simulation, from geometry, properties to numerical settings. The data files can be located anywhere as long as the PATH which points to the data file in the bracket of the INTRPT command is set correctly.
In the COSP package provided with PHOENICS, there is an example showing how the data files structure is used.
3.3 Data files for the optimisation process
There are two data files used for the optimisation purpose.
(1) Data file for activating the optimisation process
This file is named as COSPDAT. It contains only one integer, denoting the maximum EARTH cycles that could possibly take place. Usually a very large value, for example 10000 will be input to COSPDAT file, so as to make sure EARTH will be running in a perpetuum mobile mode.
If the integer in COSPDAT is set to less than 2, or if the COSPDAT file is not present in the working directory, COSP will not be activated, and EARTH will terminate prematurely. On the other hand, if the integer in COSPDAT is greater than 2, but smaller than MaxNoRun set in COSP.INP file (which will be explained below), EARTH will terminate when the EARTH cycle reaches the integer in COSPDAT, and a Fortran Run-time Error message will appear on screen. Thus the above-mentioned situations should be avoide d
(2) Data file for configuring the optimisation process
A data file called COSP.INP is needed for the configuration of the optimisation process.
As this data file contains information pertaining to the optimising method employed by COSP, it is necessary to describe the mechanism behind COSP first.
In order to find the optimum values of the constants embedded in mathematical models employed for the numerical simulation, COSP tries to minimize the objective function by changing the value of the constants. The objective function is the root mean square of the normalised residuals between the predictions, which depend on the searched constants, and experiments.
COSP has been designed so that it will carry out a systematic search over a given range of constants, until a specified criterion for the objective function is satisfied.
The optimisation process will end when any one of the 3 following criteria is satisfied:
(1) The currently calculated objective function value is equal to or less than the minimum function value pre-set in COSP.INP file,
(2) The number of EARTH cycles has exceeded the maximum earth cycle pre-set in COSP.INP file,
(3) The iteration number of the mathematical method used by COSP exceeds the value pre-set in COSP.INP file.
The above three criteria have different priority during the optimisation process, but they all cause the termination of the optimisation process. The actual cause is reported in an output data file, COSP.LST.
Information contained in COSP.INP file is divided into 6 categories, they are:
(1) Title group
(2) Experimental data group
(3) Constant group
(4) External solver group
(5) Optimisation parameters group
(6) In-Form Group
For the purpose of clarity, an example is given below to illustrate the components of COSP.INP. The right column is added for the explanation of each group of the COSP.INP file.
|
* COSP : Optimization of Wall functions
******************************************** Title = "2D Pipe turbulence flow" ******************************************** * Experimental Data Group ******************************************** * -------<DropP.F90>------------ * ExpData - Pressure drop in Pipe * DP = (kSi * L/D + 0.065) *Rho * Win^2/2 * kSi = 1/(1.82 * LG(RE) -1.64)^2 * Re = Win * D / NuL * ------------------------------ NoExpRun = 6 NoMearurVar = 1 ExpData1= 63.489 , .TRUE. *** Win= 10.00 ExpData2= 221.31 , .TRUE. *** Win= 20.00 ExpData3= 461.76 , .TRUE. *** Win= 30.00 ExpData4= 779.75 , .TRUE. *** Win= 40.00 ExpData5= 1172.0 , .TRUE. *** Win= 50.00 ExpData6= 1636.2 , .FALSE *** Win= 60.00 * Use 5 NoExpRun [ Q1 - RUN(1,5) ] ******************************************** * Constant Group ******************************************** NoConst = 2 ConstXX = ConstIni, ConstMin, ConstMax , IsUsed Const1 = 0.02, 0.01, 0.05, .TRUE. Const2 = -0.05, -0.1, 0.3, .TRUE. ******************************************** * External Solver Group ******************************************** typeesp = PINform * ( Pground & PINform ) ******************************************** * Optimizations parameters Group ******************************************** MaxPowellIter = 30 MaxBrentIter = 100 BoundaryDFDN = 10.0 MinFunValue = 0.001 MaxNoRun = 8000 IsAverageUnit = .FALSE. ******************************************** * InForm Group ******************************************** * This section used, if TypeESP = PERpetuumPhoenics or PINform ! NoInFormStr = 1 InFormStr1 = "STORED CF!WA1 C=(999001)*REP^(-(999002))" ************** End of Input **************** |
Lines starting with "*" are only comments, and can be removed from the file. Their role is to comment on the relevant content in COSP.INP file.
Title is required, and it should be given a name describing the simulated case.
Comments on what the ExpData represents
NoExpRun represents the number of available experimental runs. NoMeasurVar represents the number of variables being measured by experiment. The first experimental data, ExpData1 for pressure drop is 63.489. It is used for the optimisation, as the value is followed by the word "TRUE". If "TRUE" is replaced by "False", the experimental data will not be read and not be involved in the optimisation. Thus ExpData6 is not used.
Constant group contains data which will be used by the optimisation method.
NoConst represents the number of constants to be optimised. The first value after "Const1=" and "Const2=" is the initial guess value for the corresponding constant, the second and the third values are the lowest and the highest limits between which the optimised constant could vary. "TRUE" means the constant is to be optimised.
The External Solver Group is set a Flag to use In-Form (PINform) or Ground (Pground) for the mathematical expression.
The "Optimisation parameters group" sets configuration for the optimisation process. The most important parameters to users are MinFunValue and MaxNoRun, the former specifies the accepted value for the objective function, if the calculated objective function is less than MinFunValue, the optimisation process will stop and the results be printed out. MaxNoRun specifies the maximum run number of EARTH, if the run number exceeds MaxNoRun, even if calculated objective function is bigger than MinFunValue, the calculation will stop.
The In-Form Group is to describe the mathematical expression with the searched constants. |
COSP has specific limitation towards the parameters in the COSP input file:
NoExpVariant should be less than or equal to 128.
NoMeasurVar should be less than or equal to 4.
NoConst should be less than or equal to 10.
4. How to run COSP
4.1 COSP file structure
Once PHOENICS is installed on your local drive, you will be able to see the following directory on your drive:
PHOENICS/
D_ac3d
D_allpro
D_bodym
D_chmkin
D_cosp ------- contains COSP data files, examples, executable and source files
D_earth
D_enviro
D_include
D_intfac
D_photon
D_polis ------- contains the COSP documentation including this document
D_priv1
D_shapem
D_satell
Before starting the simulation, the user needs to create an icon for RESLOOK.EXE, which resides in D_cosp and is used to check the result during the optimisation process.
4.2 How to run examples supplied
4.2.1 Preparation of files
The user is advised to run examples supplied before using COSP to run his own cases. To run the examples, the user should only inspect the files involved, but does not need to modify any of these files. The user is recommended to run examples in the directory D_cosp (or D_priv1) although COSP can be run in any working directory.
There are several sub-directories under D_cops/examples. To run an example case, the user should copy the following files from corresponding sub-directory of D_cosp/examples to D_cosp (or D_priv1):
Q1 file
COSPDAT
COSP.INP
A readme file in each sub-directory of the examples describes the example and explains how to run it.
4.2.2 Running COSP
Once the data files are ready, the following steps start the simulation:
4.2.3 Inspection of results during execution
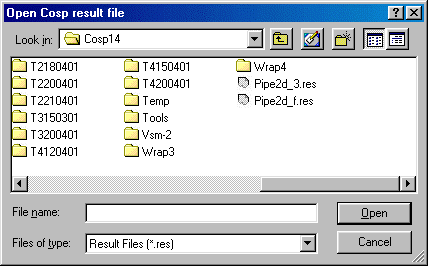
As mentioned earlier, the computation will be carried out in a perpetuum mobile mode until the requirement set in COSP.INP is satisfied. During this operation, you can check the result by using a program called RESLOOK.EXE. Double click the RESLOOK icon (which was advised to create in section 4.1) to activate it. A window similar to the following Find File window, shown in Figure 2, will appear, and the user will need to locate the result file "cosp.res" in the correct path.
Figure 2. Window for opening "cosp.res" file
Once you click the COSP.RES file, a "Cosp controls" window similar to Figure 3 will appear.
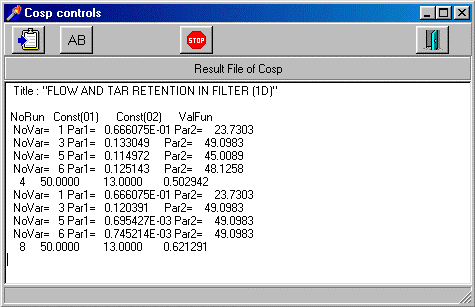
Figure 3. "Cosp controls" window
In the "Cosp controls" window, each button has its own function.
![]() To reload from COSP.RES file.
To reload from COSP.RES file.
During the optimisation process, results are written to COSP.RES continuously. Clicking on this button will reload data from COSP.RES file and reveal the latest result.
![]() To change the font of the result shown in the "Cosp controls" window.
To change the font of the result shown in the "Cosp controls" window.
![]() To terminate the optimisation process
To terminate the optimisation process
Once this button is clicked, a dialogue box will appear, asking whether to "Break process of Cosp iterations". If you click the Yes button, the optimisation process will terminate.
It should be noted that the optimisation process will not terminate immediately after you have confirmed to "break process of Cosp iterations". The simulation will only stop when the current cycle of the multi-runs has finished.
![]() To quit "Cosp controls" window
To quit "Cosp controls" window
It should be noted that clicking this button will only close "Cosp controls" window, it will not terminate the optimisation process.
4.2.4 Checking results
The user should check the following output files:
This file contains a summarisation of the investigated problem and final result. If the optimisation process failed, it will also describe the cause.
This file contains a list of the values of the searched constants and their corresponding objective function. The user can also examine its content via the RESLOOK window during the execution as described above.
This file contains the values of the variables which COSP uses to compare with experimental data.
contains results from the simulation in the form of tables of numbers and line-printer plots. The results calculated with the last set of the constants during the optimisation process are included.
The user can use PHOTON to load this file in order to display the results graphically. An alternative name for PHI from each run can be specified in Q1 by CSG1 command.
4.3.1 Modifying the data input files and Q1
When the user is ready to run his own case, he should first create input files or modify the input files of the examples according to his own requirement.
(1) Q1 file
As mentioned in section 3.1, there can be several sets of statements in Q1, each corresponding to a different set of experimental data.
(2) Data files inside DATA directory (D_cosp/data) (this is required only if the user uses the DATA file structure)
The user should provide the data files as necessary.
(3) COSPDAT
The setting of 10000 in COSPDAT does not need to be changed.
(4) COSP.INP
The user will need to modify all the groups in his COSP.INP file as described in section 3.3. The following points deserve a special attention:
It is important to ensure that the experimental data specified are consistent with the specifications in data files if the user uses the data file structure. If the user activates 4 runs in the Q1 file RUN command, he should select the same runs in the experimental data group in COSP.INP.
MinFunVal is the first criteria that the optimisation process uses to terminate the optimisation process. It is recommended that a minimum function value, 0.01 to 0.05, is set. Too large a value for MinFunVal produces inaccurate results; too small a value requires a long computational time, or even fails to reach the minimum function value.
MaxNoRun is another criteria used to terminate the optimisation process. It can take values up to what is specified (10000) in COSPDAT. However, usually a much smaller value than 10000, will be sufficient. This is mainly to limit the computational time.
The mathematical formulae expressed by In-Form should be inserted in the line InFormStrx immediately after C=. ;and Typeesp in External solver group should be PINform
4.3.2 Modify GROUND.FOR
During the searching process cycle, COSP compares the predictions with experiments. The user needs to insert his own Fortran coding in Group 19, section 8 of the ground.for file in order to produce the calculated values of variables which COSP reads and compares with experimental data specified in COSP.INP. Then ground.for should be compiled and the executable, cosexe.exe should be re-linked by using command bldcos.
4.3.3 Running COSP, checking results
Once the files are prepared, the rest of steps, regarding running COSP and checking results, are the same as described above in section 4.2
5. Worked examples
5.1 Case 1. Searching the boundary value at the outlet
This example is to show how COSP has been used to search the correct boundary value for a convection-diffusion problem for which the exact solution is available for comparison with the numerical prediction.
5.1.1 The exact solution and the data set
The mathematical descriptions for the convection-diffusion problem is as follows.
dJ/dx=1/Pe*d(dJ/dx)/dx+S,
where
S= 1-2/Pe+2x+pi*cos(pi*x)+pi**2*sin(pi*x)/Pe
Boundary conditions:
x= 0, J = 1+exp(-Pe)
x= 1, J = 4
The exact solution is :
J = 1+x+x**2+exp(-Pe(1-x))+sin(pi*x)
The exact solutions of J at x=0.5 with various Pe values are listed in table 1 and used for the COSP process
Table 1
|
NoVar |
Pe |
J at x=0.5 |
|
1 |
1 |
3.357 |
|
2 |
2 |
3.118 |
|
3 |
3 |
2.973 |
|
4 |
4 |
2.886 |
|
5 |
5 |
2.832 |
5.1.2 The task
At the start of the searching process, an arbitrary initial value, 2 has been given and the searching range has been set as
1 < J (at x=1) < 8
The task of COSP is to find the best boundary value, J (at x=1) (ideally the value should be 4) which makes the difference between the prediction and experiments be regarded as negligible.
5.1.3 Results
For this case, the grid of 40x2 has been used. The boundary values chosen by COSP at different number of runs are shown in the table 2 where F is the objective function which is used to measure the difference between predictions and experiments, and its tolerance can be specified by the user.
Table 2
|
NoRun |
F |
J ( at x=1) |
|
1 |
0.1458 |
2.00 |
|
10 |
0.109 |
2.50 |
|
50 |
0.019 |
4.24 |
|
105 |
0.001 |
3.99 |
COSP stopped at 105th run as the tolerance for F has been set to 0.001.
The best value at the boundary x= 1 found by COSP is 3.99 which is very close to the theoretical value 4.
The comparison between the exact solution and the calculated values at x=0.5 for various number of runs are shown in the table 3.
Table 3
|
Pe |
J(1) |
J(10) |
J(50) |
J(105) |
J(exact) |
|
1 |
2.601 |
2.790 |
3.448 |
3.353 |
3.357 |
|
2 |
2.576 |
2.712 |
3.187 |
3.118 |
3.118 |
|
3 |
2.602 |
2.697 |
3.023 |
2.975 |
2.973 |
|
4 |
2.643 |
2.704 |
2.920 |
2.888 |
2.886 |
|
5 |
2.677 |
2.717 |
2.855 |
2.835 |
2.832 |
The run-time for 105-runs took 107 sec on a Petium III 600MHz.
5.2 Case 2. Optimisation of the constants in the wall function for 2D pipe turbulent flow
This example is to show how COSP has been applied to a 2D pipe turbulent flow for optimisation of two constants in the wall function calculation.
5.2.1 Experimental data
The following expression by Filonenko has been employed to provide the experimental data, with which the PHOENICS predictions should agree
DP (exp) = (A * L/2*Rp + 0.065)* Rho* Wo**2 / 2;
where A = 1./(1.82*Lg(Re)-1.64)**2; Re = Wo*2.*Rp / Vis
L and Rp is the length and radius of the pipe respectively; Rho is the density, Vis is the viscosity and Wo is the velocity.
At L = 5 m; Rp= 0.5 m ; Rho= 1.22 kg/m3; Vis =1.465E-5 m2/s;
the values of DP at 6 different velocities,
W0 = 10, 20, 30, 40, 50,60 m/s
are given in the table 4. These values serve a prescribed set of data for the comparison with predictions during the COSP searching process.
Table 4
|
NoVar |
W0 , m/s |
DPexp (Pa) |
|
1 |
10 |
63.489 |
|
2 |
20 |
221.31 |
|
3 |
30 |
461.76 |
|
4 |
40 |
779.75 |
|
5 |
50 |
1172.0 |
|
6 |
60 |
1636.2 |
5.2.2 Constant searching
The standard K-E model with the Blasius wall functions has been used for the numerical simulation. The following is the equation for the skin-friction factor:
Cf = C1/ Re**C2.
with the known constants, C1=0.023 and C2=0.25.
At the start of the constant-searching process, the initial guess values, C=0.02 and C2= -0.05 have been given and the following searching ranges have been set,
0.01 < C1 < 0.05; -0.1 < C2 < 0.3
The task for COSP is to find, by performing the above-described 'multi-runs', the constants, C1 and C2 which fit the predictions best to the experiments.
5.2.3 Results
For this case, the grid of 20x20 has been used. The results of the constant-searching for different number runs are shown in the table 5.
Table 5
|
NoRun |
F |
Const1 |
Const2 |
|
1 |
1.63 |
0.02 |
-0.05 |
|
648 |
0.045 |
0.0116 |
0.148 |
|
1290 |
0.028 |
0.0161 |
0.1895 |
|
2508 |
0.015 |
0.021 |
0.2191 |
|
3072 |
0.0041 |
0.025 |
0.243 |
The comparison between the experimental and the calculated DP for different number of runs are shown in the table 6.
Table 6
|
W0 |
DP(1) |
DP(648) |
DP(1290) |
DP(2508) |
DP(3072) |
DP(exp) |
|
10 |
147.596 |
57.5819 |
59.5385 |
62.4620 |
63.1005 |
63.489 |
|
20 |
556.102 |
213.139 |
215.607 |
222.729 |
222.243 |
221.31 |
|
30 |
1210.88 |
458.046 |
457.424 |
468.230 |
463.779 |
461.76 |
|
40 |
2104.93 |
788.044 |
779.773 |
792.982 |
781.274 |
779.75 |
|
50 |
3233.55 |
1200.27 |
1179.18 |
1193.03 |
1170.54 |
1172.0 |
|
60 |
4593.12 |
1692.58 |
1653.06 |
1665.47 |
1628.46 |
1636.2 |
The run-time for 3072-runs is 17 hr on a Petium III 600MHz.
6. The feature of COSP
The above examples have shown that COSP can be used to reliably choose, from arbitrary initial values, the boundary value for the first case and the constants for the second which best fit the prescribed set of the data.
It might reasonably be said the COSP represents the first step towards answering the designer's real CFD question, which is often not, 'What will the flow be if I choose these inflow conditions?' but rather 'What inflow conditions will give me the flow that I want?'
That being so, the future for COSP appears very bright. Being new, it has only a modest track record at present. Once its capabilities are recognised by PHOENICS users however, that situation can be expected soon to change.