This workshop example shows how to create an ASSEMBLY object, export it as a POB and then import it into another model. Finally, it is shown how to temporarily remove an object from an assembly so that it can be moved relative to the other objects in the assembly.
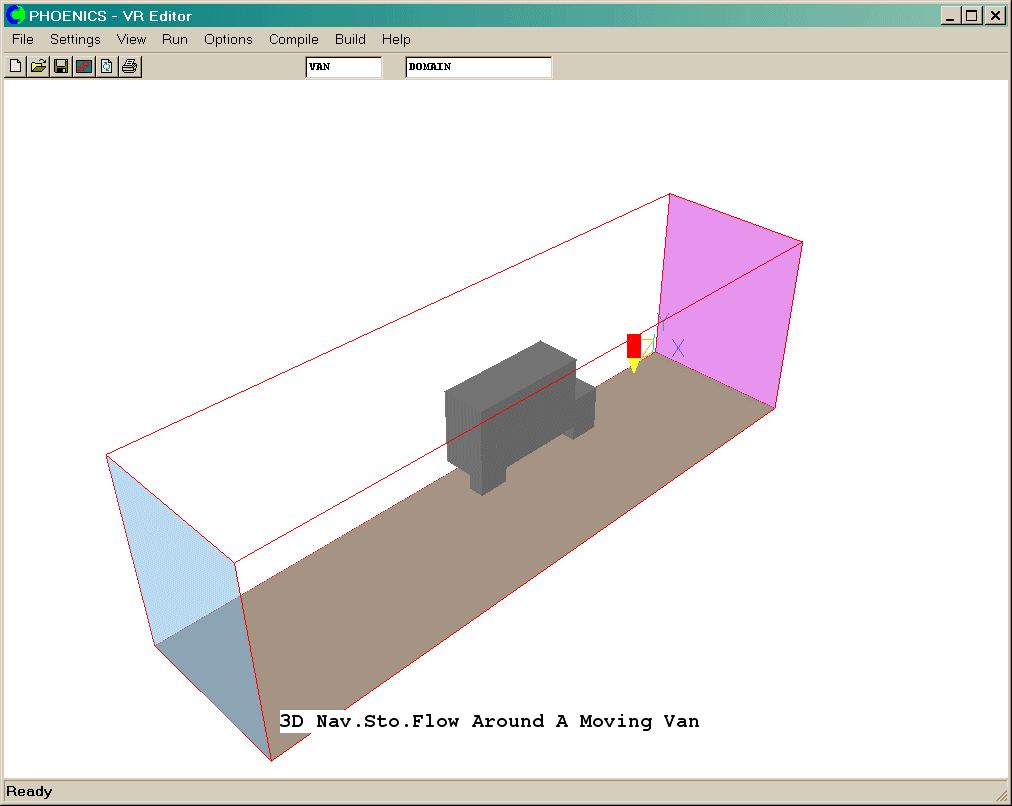
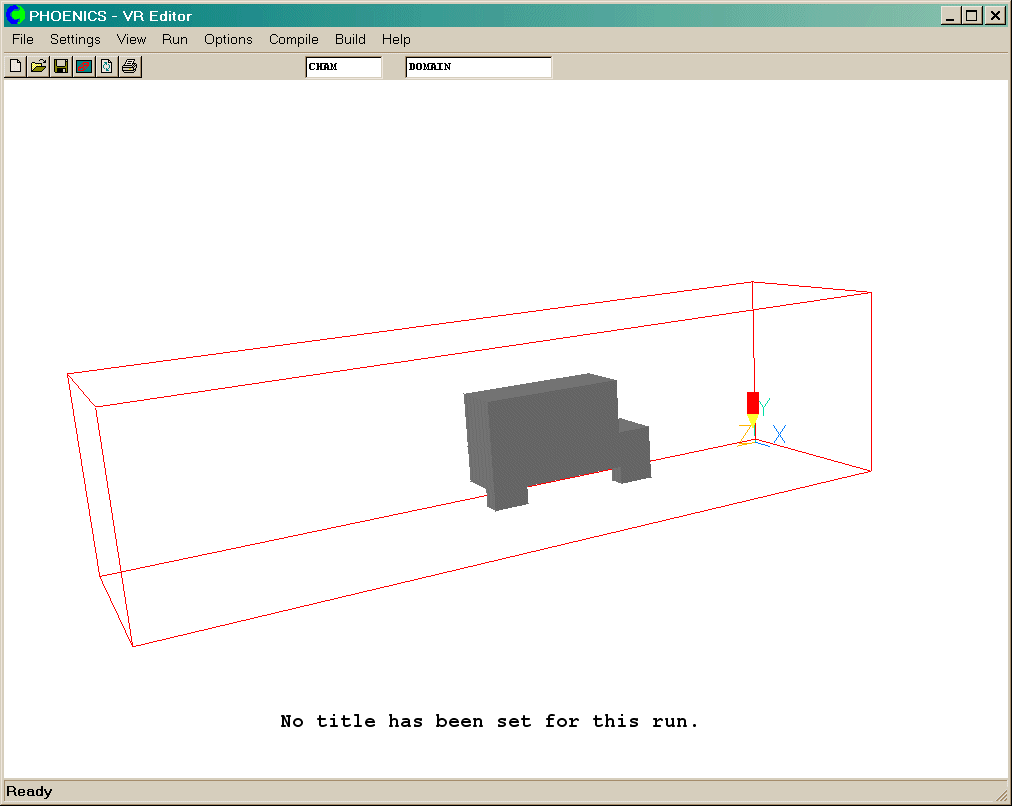
The example is based on library case 274, Flow around a Moving Van. Its geometry is shown in the figure below.
The aim is to take the 4 objects making up the van body and make them into a single unit, which can then be re-used.
From the system level:
To enter the PHOENICS-VR environment, click on the PHOENICS icon on the desktop, or click on Start, programs, PHOENICS, PHOENICS.
In PHOENICS-VR environment,
Load library case 274 - click on 'File' then on 'Load from libraries', enter 274 in the 'case number' entry-box, then click on 'OK'.
To enter VR Editor:
This is the default mode of operation .
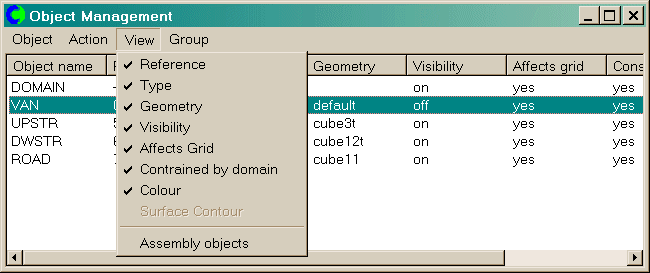
Create the Assembly object which will hold the van-body components:
Click on the Object management button
. Click 'Object' , 'New' and 'New Object', Assembly'.
Click on 'Size' and set the size of the object as:
Xsize: 1.5
Ysize: 3.0
Zsize: 5.0
This is the right size to cover the existing object making up the van.
Click on 'Place' and set the Position of the object as:
Xpos: 0.0
Ypos: 0.0
Zpos: 5.0
Click on 'General'.
Set the name to VAN.
Click 'OK' to return to the Object Management Dialog.
Re-order the objects
At this point, we need to add the component objects to the assembly. The component objects must appear in the list of object with higher order numbers than the parent object.
The assembly object is object 7, the body and wheel objects are objects 0 - 3. We must re-order the list to bring the assembly object VAN above BODY1.
Select the VAN assembly object, and with the cursor over the 'Reference' column, click the right mouse button. The following context menu should appear:
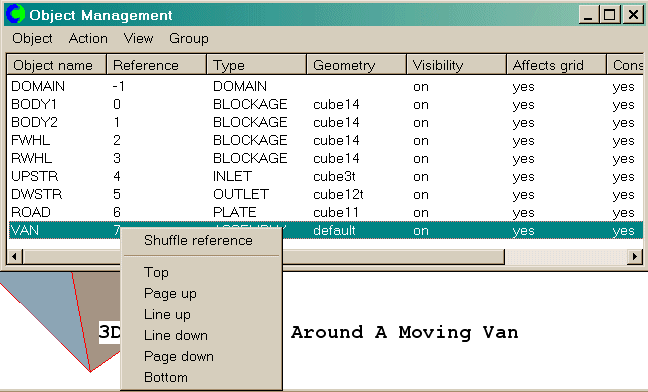
Click on 'Top' to bring the VAN object to the very top of the list.
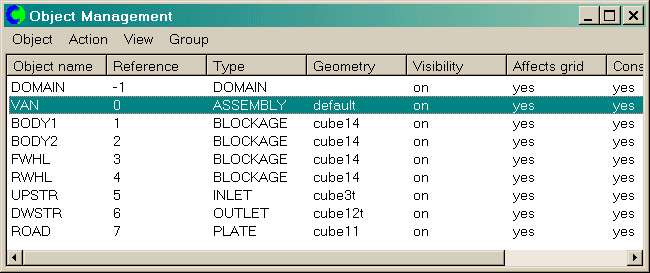
Add the components
Double-click on VAN to bring up the Object Specification Dialogue Box.
Click on 'Hierarchy', then 'Add components'. A list of object will appear.
Click on BODY1, then with the shift key held down, select RWHL. All intermediate objects will be selected. Click 'OK'. The Hierarchy dialog will now show that there are 4 components. Click 'OK'.
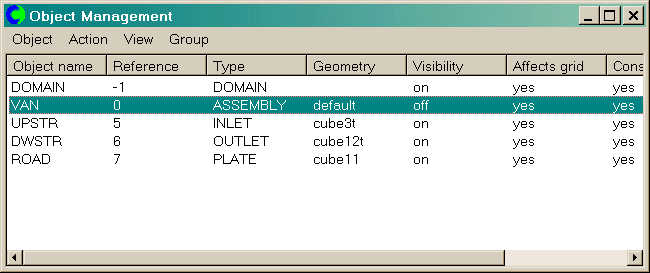
Click to the 'Options' pane and tick the 'Hide object' box to hide the assembly, and on 'OK' to close the Object Specification Dialogue Box. The assembly object itself is merely a 'holder', and does not need to be visible.
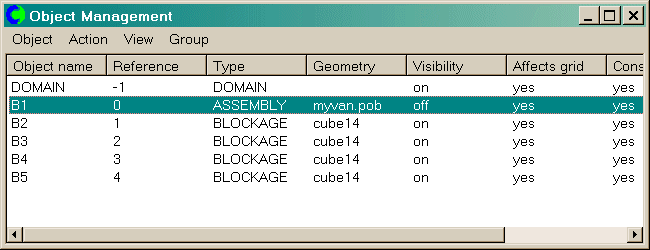
The Object Management Dialog will now show:
To reveal the components of the VAN assembly object, click on 'View', and select 'Assembly objects'
Bringing up the dialogs for any of the component objects wild show that the 'Place', 'Size' and 'Shape' panes have disappeared. The size and location of these objects is now controlled through the parent assembly. The attributes of each component can still be set individually.
Saving the VAN as a POB file.
From the Object Management Dialog bring up the Object Specification Dialog for the VAN assembly object. Click on 'Export'. Click on 'File name' and enter 'myvan' in the input box. Click 'Save' to close the file selector, then 'OK' to close the Export dialog. Click 'OK' to close the information dialog about the saving of the file.
Note that when the Size or Place settings for the assembly are changed, all the components are scaled or moved accordingly.
Importing the VAN assembly into a New Model.
Start a new case - click 'File', 'Start new case', 'Core', 'OK'. Set the size of the domain to 5*5*20. (Enter 5 into the X-size entry-box on the hand-set and click into the Y-size box. Enter 5 and click into the Z-size box. Enter 20 and click into the X-size box). Manipulate the view so that the domain box fits the screen, and the Y axis is pointing up.
Click on the Object Management button
Select 'myvan.pob' and click 'Open'. A dialog showing the default location of the assembly will open. The values in here are the same as the 'Place' settings made when the assembly was created. To accept these values, click 'OK'. The van will now appear on screen,
and the Object Management Dialog will show:
Moving components of an assembly relative to each other
Let us now suppose that we want to move the blockage making up the upper part of the body, B3, relative to the lower part.
In order to do this, it must be temporarily removed from the assembly.
Bring up the Object Specification Dialog for B3, and click on 'Hierarchy'. Click 'Disconnect', and 'OK' several times to return to the Object Management Dialog.
Bring up the Object Specification Dialog for B3 again. This time, the 'Size', 'Place' and 'Shape' panes will have re-appeared. Click on 'Place, and change the Z position to 5.0.
Click on 'General', then 'Hierarchy'. Click 'Make into a component', and select B1. Click 'OK' several times to return to the Object Management Dialog. B3 will now be re-attached to the assembly B1.