FLAIR Tutorial 7: A computer room
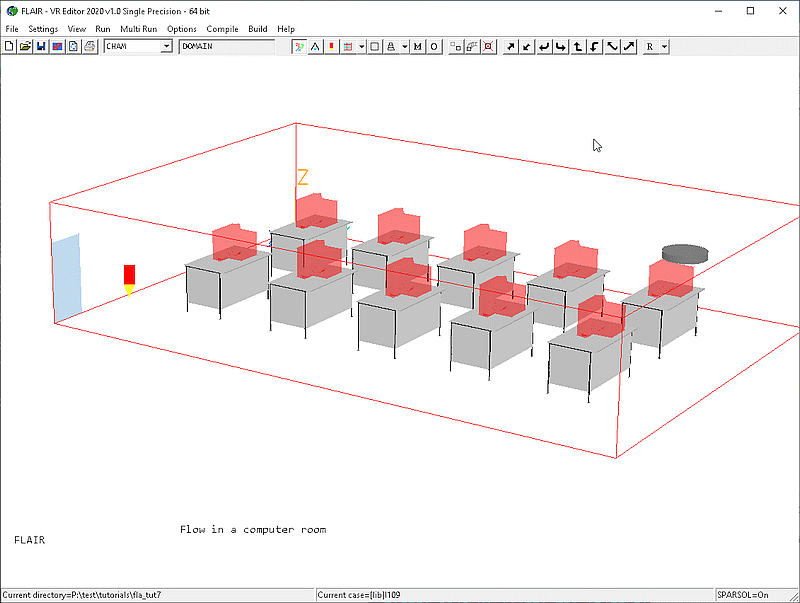
This tutorial involves a computer room with an array of computers sitting on desks. A
door is open and air is injected through a diffuser on the far right side of the ceiling
as shown in the following picture. The case shows how to use 'Group' and 'Arraying
objects' features to add the desks and computers. A round diffuser is loaded from the
predefined HVAC object library.
Setting up the model
Start FLAIR with the default room
- Click FLAIR icon (a desktop shortcut created by the FLAIR installation program); or
- Start the VR-Editor by clicking on 'Start', 'Programs', 'FLAIR', then 'FLAIR-VR'.
- Click on the 'File' button and then select 'Start new case', followed by 'FLAIR' and
'OK'.
The FLAIR VR-Environment screen should appear, which shows the default room with the
dimensions 10mx10mx3m.
Resizing the room
- Change the size to 15m in y-direction on the control panel.
- Click on "Reset" button,
 on the movement panel and then click "Fit to window".
- Click on 'OK' to exit Movement Panel
Adding objects to the room
a. add a door
- Click on the 'Object' menu and select 'New' (New Object) 'Opening' and select Y plane on the 'Object management'
dialog box to bring up the 'Object specification' dialog box
- Change name to 'DOOR'.
- Click on the 'Size' button and set 'Size' of the object as:
X:1.0 m
Y:0.0 m
Z:2.0 m
- Click on the 'Place' button and set 'Position' of the object as:
X: 9.0 m
Y: 0.0 m
Z: 0.0 m
- Use the default attributes settings for the door
- Click on 'OK' to close the 'Object specification' dialog box.
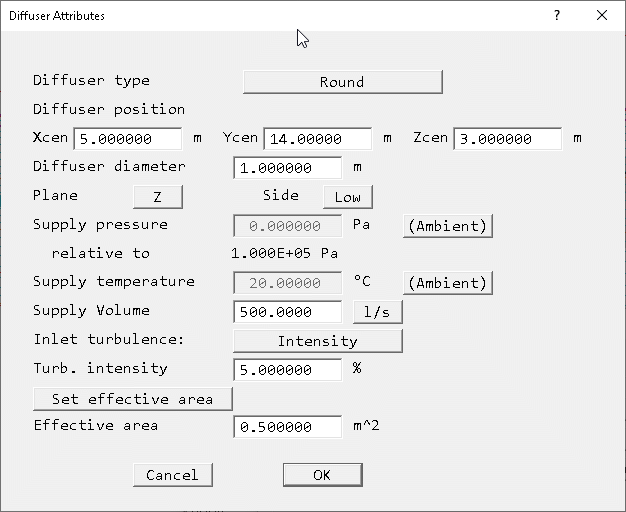
b. add the diffuser
c. add the array of desks and computers
- Click on the 'Object' menu and select 'New' (New Object), 'Blockage' on the 'Object management'
dialog box to bring up the 'Object specification' dialog box
- Change name to 'DESK'.
- Click on the 'Size' button and set 'Size' of the object as:
X: 2.0 m
Y: 1.2 m
Z: 1.2 m
- Click on the 'Place' button and set 'Position' of the object as:
X: 2.0 m
Y: 2.0 m
Z: 0.0 m
- Click on 'Shape' and select the 'desk' object from the directory
d_object/public/furnture for the geometry
- Click on 'OK' to close the object specification dialog box
- Click on the 'Object' menu and select 'New' (New Object), 'Heat source' on the 'Object management'
dialog box to bring up the 'Object specification' dialog box
- Change name to 'MONITR'.
- Click on the 'Size' button and set 'Size' of the object as:
X:0.8 m
Y:0.8 m
Z:0.8 m
- Click on the 'Place' button and set 'Position' of the object as:
X: 2.6 m
Y: 2.0 m
Z: 1.2 m
- Click on 'Shape' and select the 'monitor' object from the directory
d_object/public/furnture for the geometry
- Click on 'General', then 'Attributes'. Set the total heat source to 150W.
- Click on 'OK' to close the object specification dialog box
- Highlight the DESK and MONITR objects on the 'Object management' dialog box
- Click on 'Object' menu and select 'Array objects' option. This will bring up the 'Array
settings' dialog box on the screen
- Set dimension and pitch values as shown below
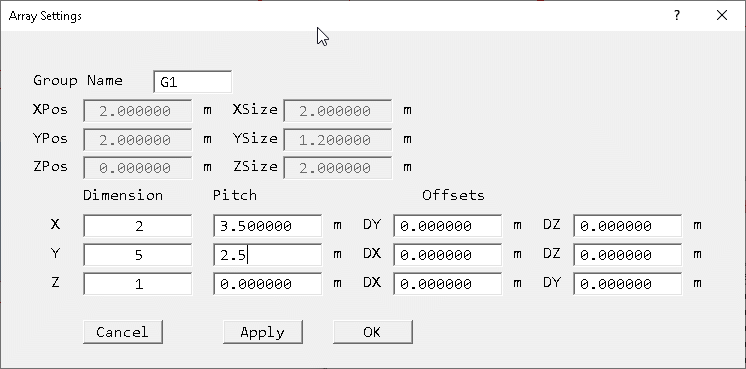
- Click on 'OK' to complete the arraying objects operation
To activate the physical models
a. The Main Menu panel
- Click on the main 'Menu' button.
- Click on the 'Title' dialogue box. Then type in 'Flow in a computer room'.
- Click on 'Models' to obtain the Model menu page.
FLAIR always solves pressure and velocities. The temperature is also solved as the
default setting.
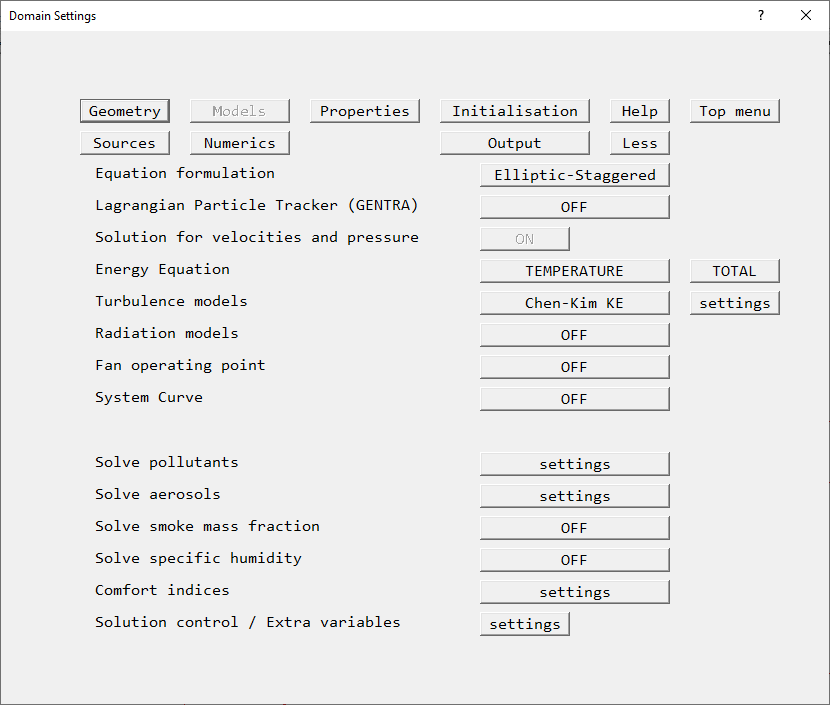
The 'Models' page of the Main Menu.
- Click on 'Top menu'.
- Click on 'OK'.
b. To set the grid numbers and to solver parameters
- Click on the 'Mesh toggle' button,
 on the main control panel to view the grid distribution on the
screen.
on the main control panel to view the grid distribution on the
screen.
- The default 73 * 74 * 43 grid produced by the auto-mesher is too fine for the purposes of the tutorial. Right-click
on the mesh to bring up the interactive meshing tool. For the X, Y and Z directions in turn move the slider to
the right to reduce the mesh to around 34 * 48 * 25. This will be when the 'Minimum cell fraction' is 2.5%.
- Open the Main menu
- Click on 'Numerics', then set the 'Total number of iterations' to 300
- Click on 'Top menu'
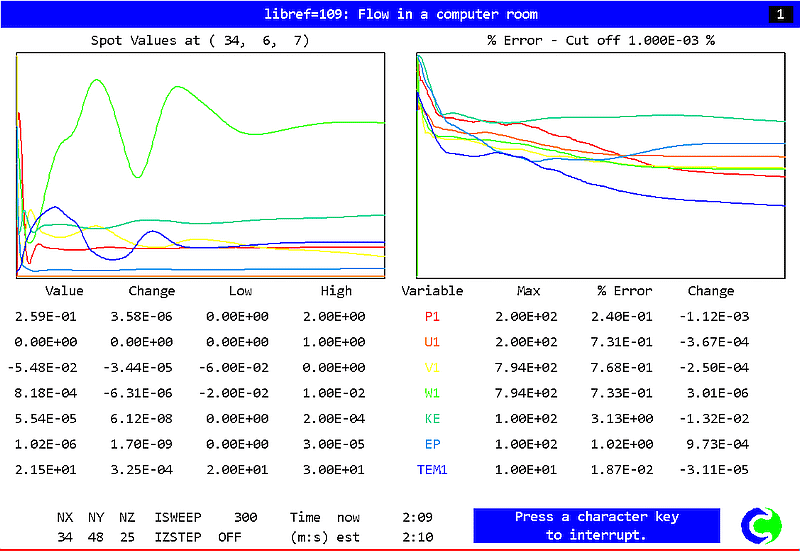
- Click on 'Output' button and set the monitor-cell location to (16,13,3).
- Click on 'Top menu' and then 'OK'
Running the Solver
To run the PHOENICS solver, Earth, click on 'Run', then 'Solver', then click on 'OK' to
confirm running Earth. These actions should result in the PHOENICS Earth monitoring
screen.
As the Earth solver starts and the flow calculations commence, two graphs should appear
on the screen. The left-hand graph shows the variation of solved variables at the
monitoring point that was set during the model definition. The right-hand graph shows the
variation of errors as the solution progresses.
To the end of the calculation, the monitoring display would be as shown below.
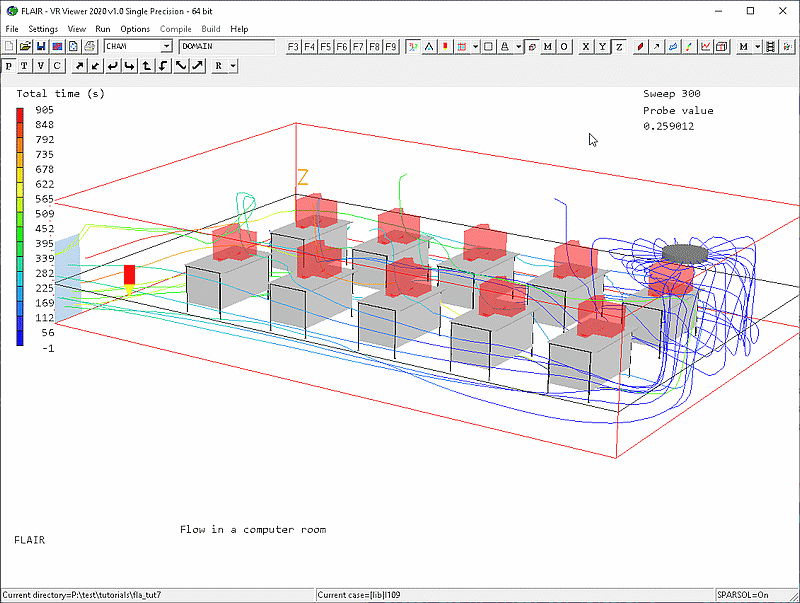
Viewing the results
- Click on the 'Run' button, then on 'Post processor', then 'GUI Post processor (VR
Viewer)' in the FLAIR-VR environment.
- When the 'File names' dialog appears, click 'OK' to accept the current result files. You
may use the 'Object management' dialog box to hide some of objects.
- Click on the 'V' (Select velocity) button,
 .
.
- Click on 'Streamline management' button,
 .
.
- Move the probe position to X = 5; Y = 14.5; Z = 2.8.
- Click on 'Object' menu and click on 'Options' to bring up the 'Stream Options' dialog
box
- Choose the following settings
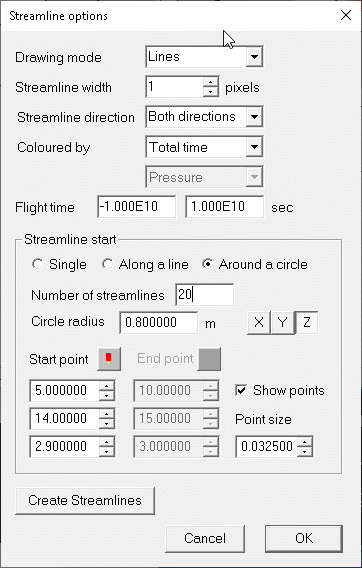
- Click on 'OK' to close the 'Stream Options' dialog box
- Click on 'Object' menu on the 'Streamline management dialog box and click on 'New'. You
will see the following picture on the screen.
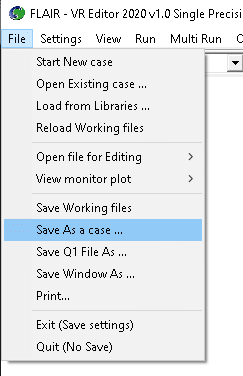
Saving the case
Once a case has been completed, it can be saved to disk as a new Q1 file by 'File -
Save working files'. The Q1 and associated output files can be saved more permanently by
'File - Save as a case'.