In this tutorial you will learn about:
At the end of the tutorial you may like to confirm your understanding by the following exercises:
In BFC, as for Cartesian/polar co-ordinates, the geometry is created first, and the mesh is fitted later.
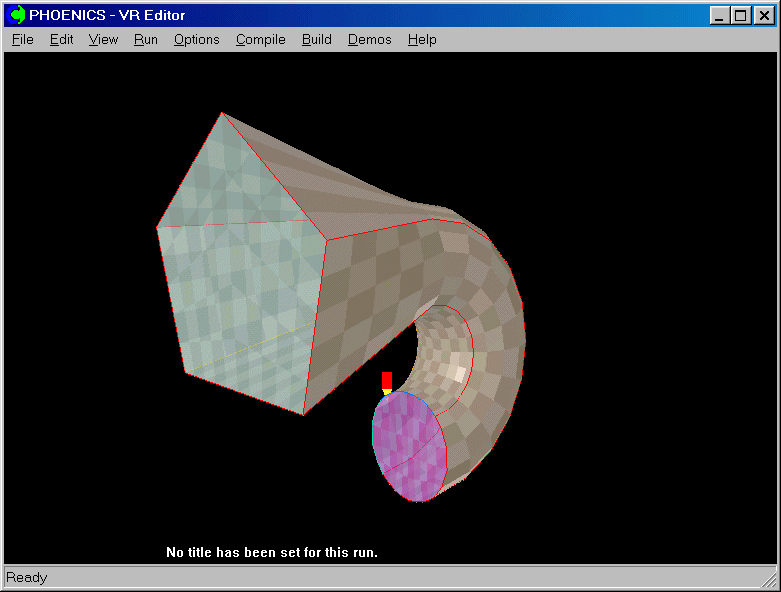
This tutorial deals with the creation of the geometry for a duct, where the cross-section changes from a pentangle to a circle along the length.
The order of the data entity generation and modification is:
This tutorial covers stage 6.
In BFC Tutorial 1, we created the geometry for the pentangle and circle, and in BFC Tutorial 2 we created the required frames. In BFC Tutorial 3 we set the default grid, and matched the grid at planes K 11 and K 16 to the circle and pentangle respectively.
We now complete the process of meshing.
From the system level:
To enter the PHOENICS-VR environment, click on the PHOENICS icon on the desktop, or click on Start, programs, PHOENICS, PHOENICS.
In PHOENICS-VR environment,
Start with Library case B113 - click on 'File' then on 'Load from libraries'. Type B113 into the Case Number box, then click OK.
From the commander level:
To enter the PHOENICS-VR environment, click on the 'Run vre' icon in the left column.
To enter VR Editor:
This is the default mode of operation.
Activate the Grid Generator by clicking on the Grid mesh toggle on the hand-set ![]() , then clicking anywhere within the domain to bring up the BFC menu dialog.
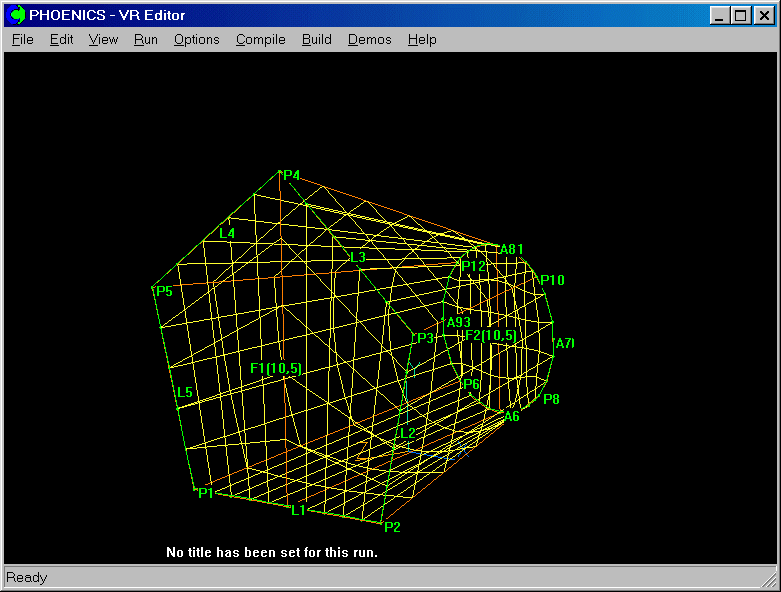
The grid generator screen is shown below:
, then clicking anywhere within the domain to bring up the BFC menu dialog.
The grid generator screen is shown below:

If you are continuing BFC Tutorial 3, you will join Tutorial 4 here.
We have created two frames, each having 10*5 cells, and have matched them to the K=16 and K=11 planes.
We now want to smoothly interpolate the mesh between K=11 and K=16, to create the intermediate planes.
Click the 'Volumes' button. The dialog for creating volumes has options for:
| Extruding a surface | 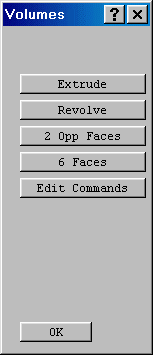 |
| Revolving a surface about an axis | |
| Joining two opposing surfaces | |
| Filling in a volume enclosed by six surfaces | |
| Modifying the list of commands |
To vary the mesh smoothly between frames 1 & 2, click on '2 Opp faces'.
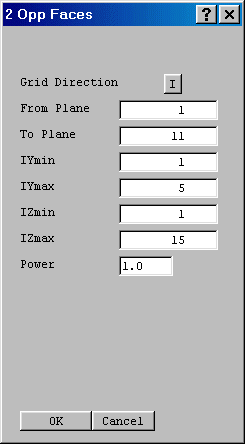
By default the transfer works on the I plane. The other planes are available by toggling. Toggle from I through J to K. Enter 11 in the 'from plane' box ( Frame F2 is matched to K 11, and F1 is matched to K 16). Click 'OK' to apply this transfer.
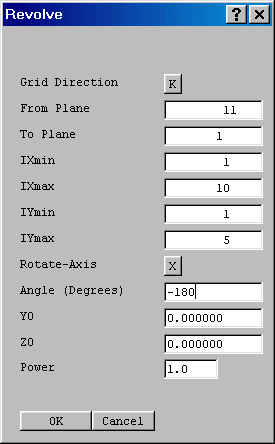
Once the duct becomes circular at frame F2, it is to rotate through 180 degrees, centred on the X axis. This section will contain a further 10 cells in K.
Click on 'Revolve'. The Revolve dialog will appear:
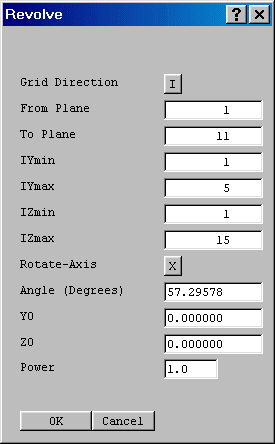
By default the I plane is revolved about the X axis by 1 radian (57 degrees). The other planes are available by toggling. Toggle through J to the K planes. Note: the default limits are the entire domain.
Enter 11 in the 'from plane' box (frame F2), and 1 in the 'to plane' box.
Select the axis to rotate about as X and set the angle of rotation to -180 degrees.
Specify the Y & Z co-ordinates of the rotation axis as (0.0, 0.0).
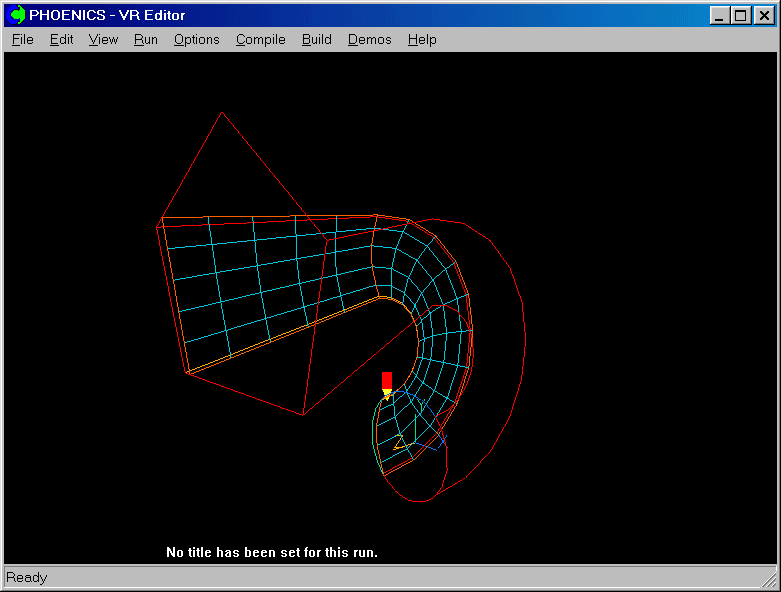
Click 'OK' twice to apply the modifications and return to the BFC Menu. Click on 'Reset' on the Movement control panel then on 'Fit to window' to scale the image to fit the screen:
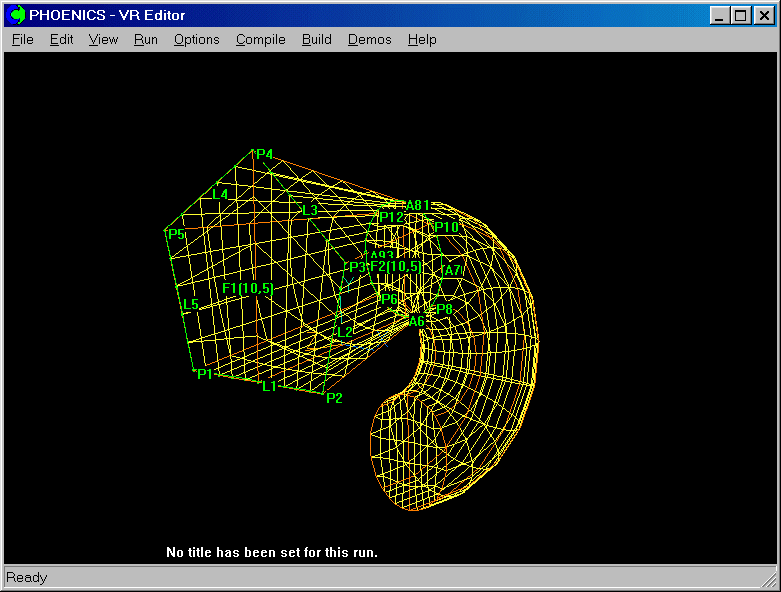
Now that the grid is complete, click 'OK' to get back to the VR-Editor.
If you want to proceed directly to the last tutorial in the sequence tutorial, which deals with setting the flow boundary conditions, click here.
To summarise, in this Tutorial you have learned how to:
We now suggest you practice each of these functions 'live' for yourself with the following exercises:
To save the work so far, click on 'File', 'Save as a case', make a new folder called 'BFC ' (e.g.) and save as 'BFC4'.