Encyclopaedia Index
Click here
for "Starting with PHOENICS VR" (TR/324).The PHOENICS Virtual-Reality interface provides an easy means for setting up flow-simulation problems and for exploring the flows which result from their solution.
This PHOENICS Encyclopaedia article recounts the history of its development, and explains and illustrates its use.
PHOENICS-VR can now read in and interpret geometry files produced by CAD (ie Computer-Aided-Design) packages. Click here for CAD-to-CFD
CHAM is committed to spreading the benefits of computational fluid dynamics to the widest
possible range of users, and especially to those who wish to use CFD as a reliable tool,
without becoming CFD specialists.
To the latter, the problem-set-up, grid-generation and results- interpretation aspects of CFD present serious obstacles, round which easy paths must be found.
In early 1995, CHAM began to provide to selected users of PHOENICS a "Virtual-Reality" interface.
This interface incorporated the commercial virtual-reality software package called Superscape; and it was developed by CHAM in collaboration with Colt-VR Ltd.
This VR interface enabled users to set up flow-simulation tasks for PHOENICS in "real-life terms", placing walls, apertures, heat sources, fans, etc., where they wanted them, and seeing them appear instantly on the screen in a life-like manner.
The same interface permitted the results of the flow simulation to be displayed, explored and interpreted, very much in the same manner as is adopted by an experimenter holding a thermometer and a wind gauge.
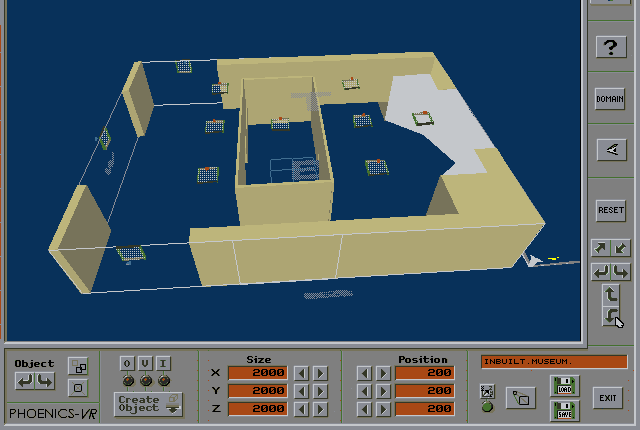
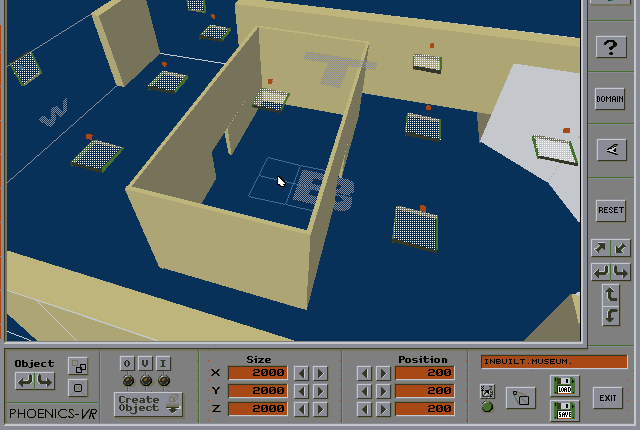
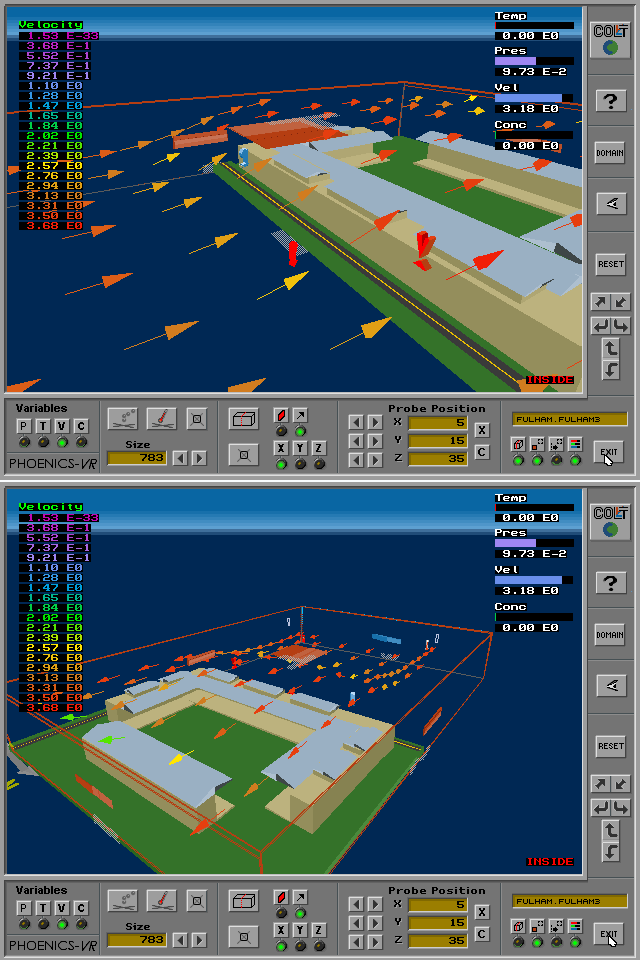
The next sequence of pictures from the Applications Album illustrate its use in conjunction with the air-conditioning of a museum.
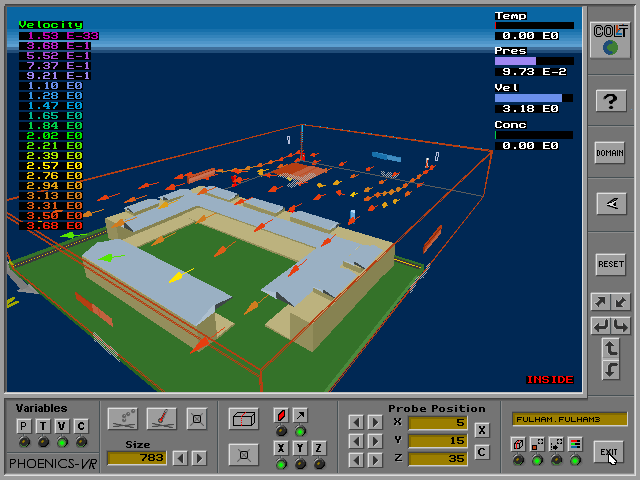
Another application of this version of the VR interface was to the wind flow in a football ground, as it was likely to be affected by the building of a new stadium. Two pictures now follow.
This European-Commission-supported project, proposed and coordinated by CHAM, started on January 1 1997.
Its aim is to demonstrate how CFD can be made accessible to an enlarged community of users, who will:
Ten distinct user-application sectors are distinguished (See PHOENICS Encyclopaedia entry: MICA).
In order to meet the varied input-data and results-display requirements of the ten application sectors, the capabilities of the VR interface had to be extended.
It was therefore decided that CHAM should create its own version of the virtual-reality interface and integrate it into the PHOENICS Satellite.
This was effected during the first half of 1996, the result being issued with PHOENICS version 2.2.1 on October 1 of that year.
The 1996 PHOENICS-VR, called briefly VDI (for visual data input) and then VDIO (for visual data input and output), looked superficially similar to the 1995 Colt-Superscape version, but had much-extended functionality.
Under development during 1997, and due for issue with PHOENICS-3.0, is a further development of PHOENICS-VR which differs from its predecessors in being entirely "grid-free".
This means that the VR user gives no thought to the nature or fineness of the computational grid which is to be used, this being left to the expertise of the EARTH code.
ASAP (Arbitrary Source Allocation Procedure) plays a major part in fitting the objects created by VR into the grid selected by EARTH. (See the relevant PHENC entry).
Fine-grid embedding and other accuracy-promoting techniques are also to be employed.
The remainder of the present Encyclopaedia article is concerned however with PHOENICS-VR version 2.2.1. This does possess grid- related features.
PHOENICS-Virtual-Reality has been devised as an additional problem- set-up and results-appreciation package for use by:-
As implied above, PHOENICS-VR is used for two kinds of operation, viz:
At the end of the first operation, files are written which, when the command is given, will cause the flow-simulating calculation to begin.
However, the user has the opportunity, if he wishes, to inspect and modify those files. Experienced users of PHOENICS, therefore, can still introduce their personal expertise.
The same is true of the display of results: the experienced user can still employ PHOTON, TECPLOT or other post-processing procedure.
PHOENICS-VR, in its display mode, has been devised for the person who wants to match the results of the calculation very closely with the imaginary "world segment" which he set up at data-input time.
The next two sections of this article will be devoted to the data-input and results-appreciation modes in turn.
The PHOENICS Virtual-Reality Interface requires its user to possess only basic keyboard-and-mouse skills.
This VR system is of the "non-immersive" kind, which means that no special gloves or head-sets are required.
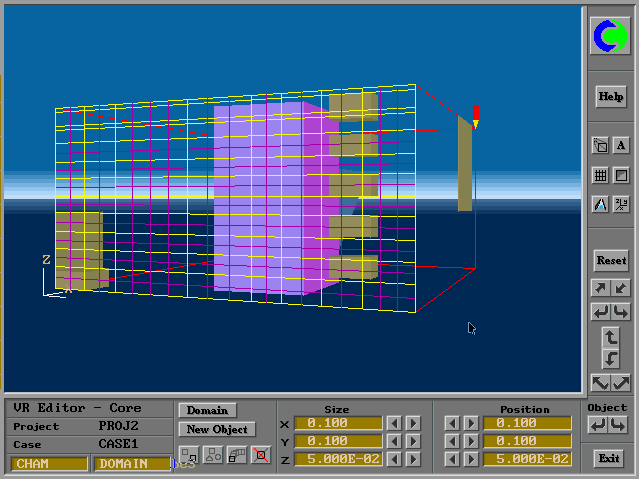
The next picture shows the control screen which is presented to the user.
The various buttons and arrows permit the view to be controlled, and the various objects to be moved, re-sized, deleted, or duplicated.
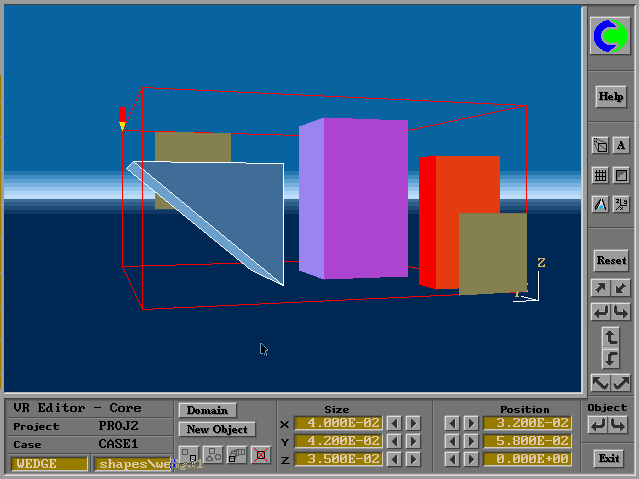
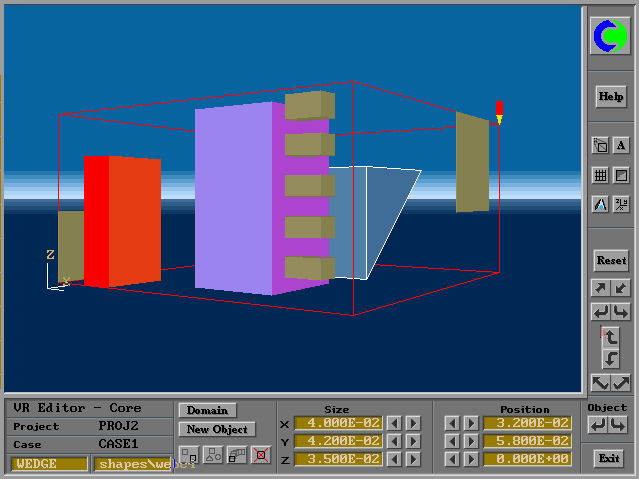
This is an illustration of how objects of various shapes and sizes are brought in and positioned.
Note the control buttons around the edges of the screen.
Placing the mouse on the appropriate arrows enables the objects to be viewed from various angles
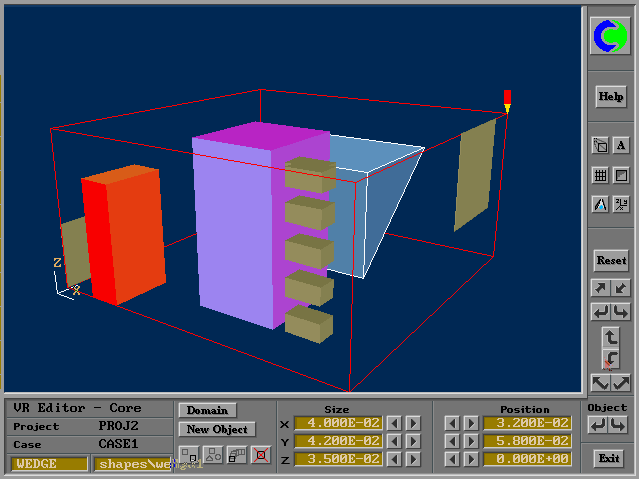
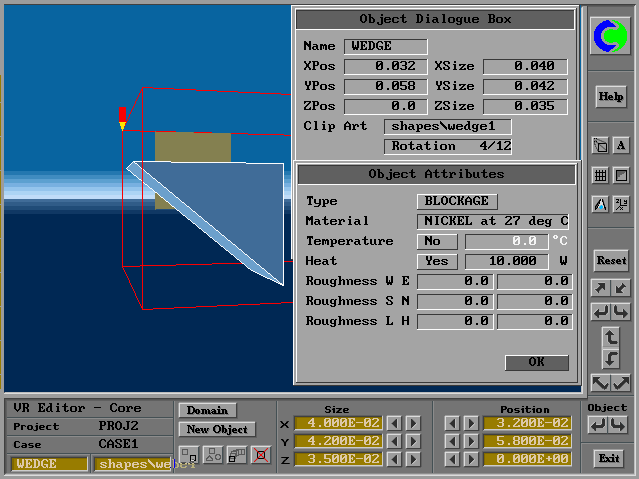
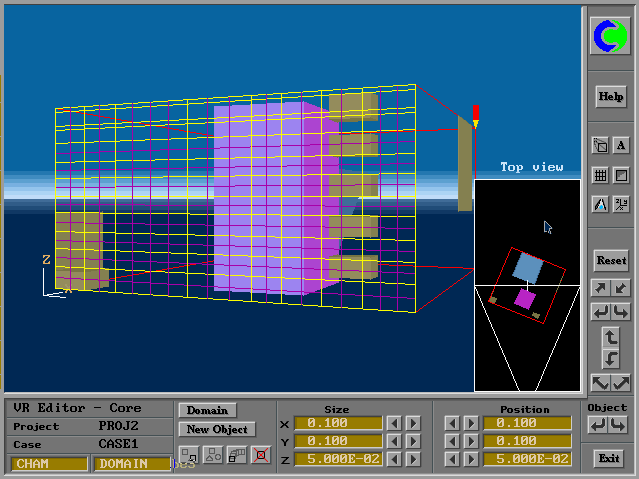
Clicking on an object brings a "dialogue box" on to the screen. This enables a name to be typed, and some data to be altered.

Clicking on attributes brought in this new box
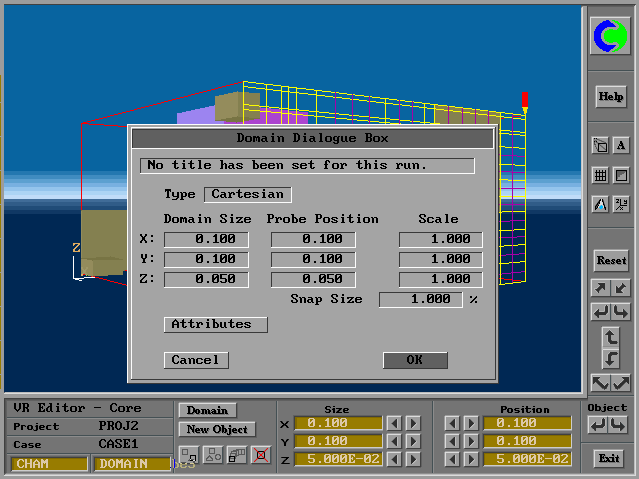
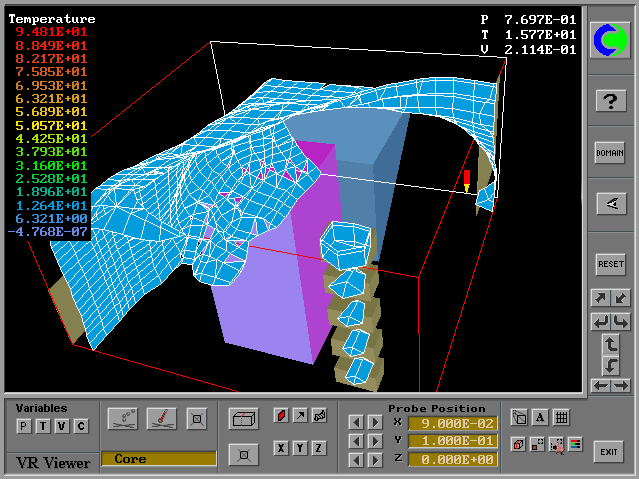
Grids can be displayed
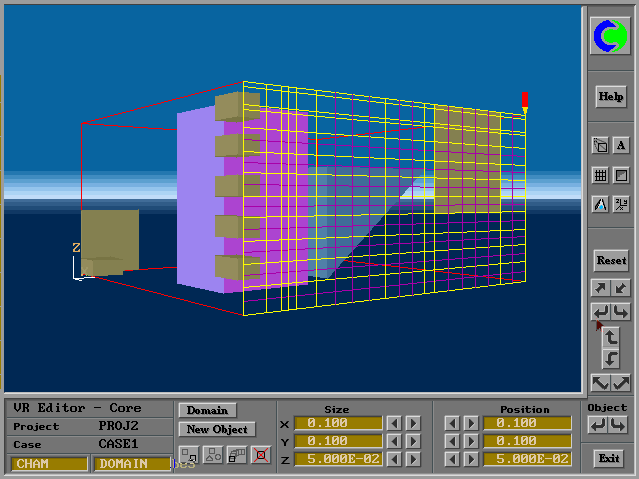
and modified
The materials of which solid and fluid objects are composed are selected from lists which can be called into the dialogue boxes.
A "fluid object" could comprise, for example, a region in which there exists a gas mixture with a particular fuel/air ratio.
The PHOENICS Virtual-Reality Interface allows the user to select models of ignition, laminar flame propagation, turbulent mixing and turbulent combustion, through the "domain" dialogue box.
If the user makes no selection, the built-in defaults, which are usually satisfactory, will be employed.
Among the objects which the PHOENICS interface can call into its "virtual-reality world" are inlets, outlet apertures, and sources of mass, momentum and energy.
They can be named, located, and given qualitative and quantitative attributes, in the same "dialogue-box" manner as employed for solids.
The apertures may be of the "bursting-panel" character; and indeed the flow rate through them can be any non-linear function of pressure difference and time.
Fan characteristics are introduced in this way.
They may also consist of sources of gas or liquid which become active after the start of the explosion as a consequence of the passage of the flame, or of the pressure wave which precedes it.
Initial-condition "objects" are introduced in the same fashion.
They may represent the distributions of fuel-air ratio within the module; or they may define the time, location and strength of the ignition source.
The shapes of such initial-condition objects may be box-like, ellipsoidal, cylindrical or wedge-shaped; and more complicated shapes may be created by combinations of these.
It should also be stated that the inventory of shapes which are currently supplied can be augmented by any others for which there is sufficient demand to justify the (not-very-large) cost of preparing them.
At data-input time, users may, if they wish, indicate their desire for particular pieces of information to be supplied at the end of the not-yet-started flow-simulating computation.
This is done by introducing "output objects" into the world.
This is especially advantageous when either:-
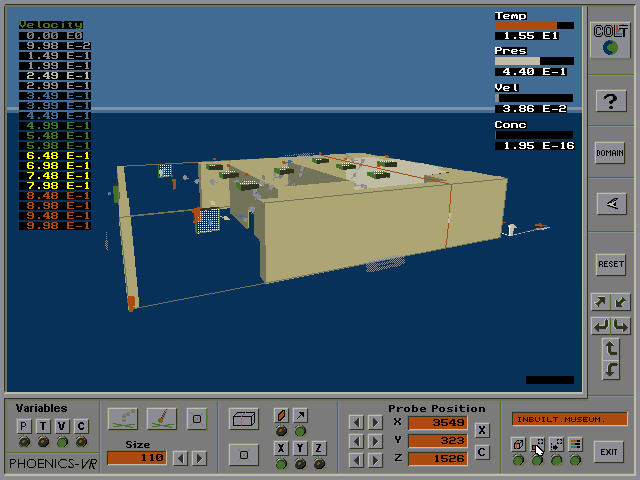
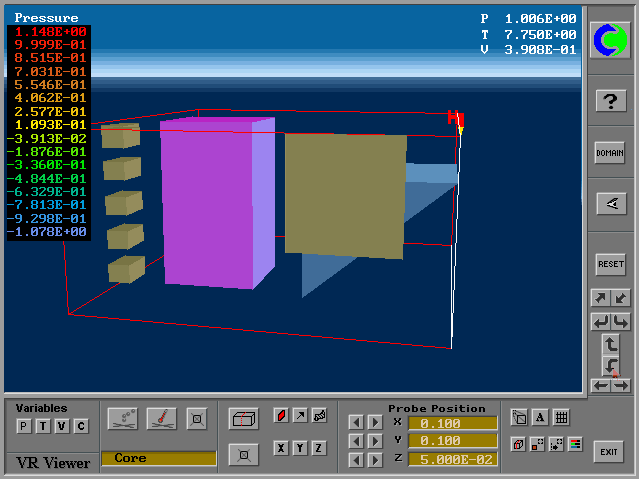
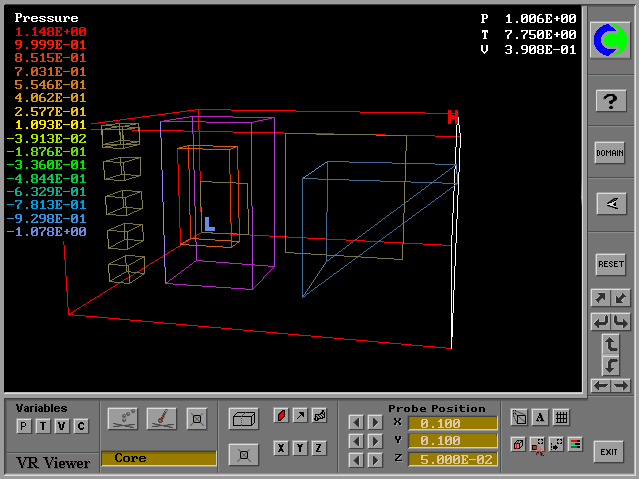
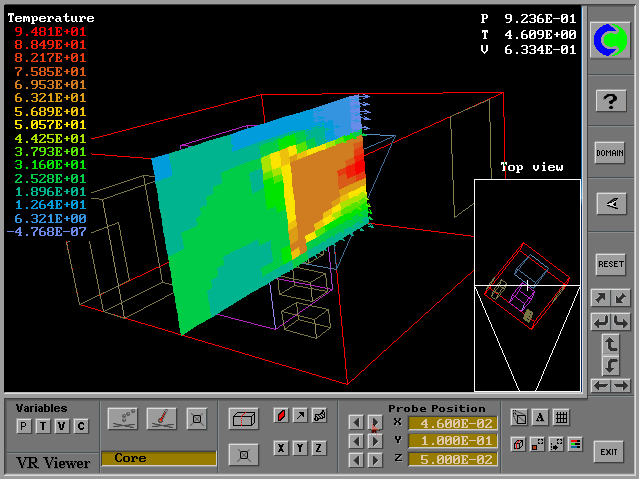
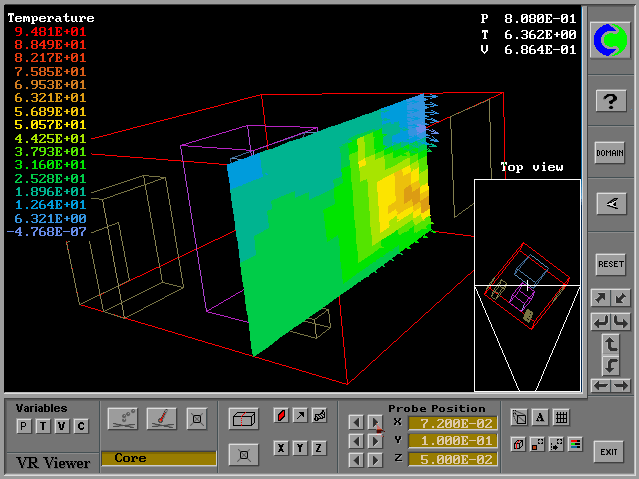
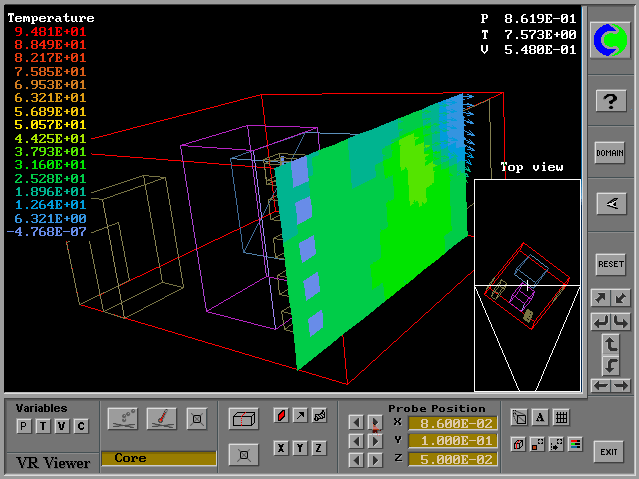
The PHOENICS interface is used for viewing and exploring the results of the simulation, as well as for setting up the problem at the start.
Entry is by way of the VR Viewer option of the PHOENICS Commander, choice of which presents the user with a picture of the world which he created; but this now has a different set of control buttons.
Important features to note in the pictures are:-
When the user is satisfied that he has sufficiently defined his "world", he simply issues a "calculate-the-flow-in-this" command, and leaves the rest to PHOENICS. "The rest" means:-
Once the PHOENICS-Earth program has performed the computations and dumped the results into a file, the contents of this file are processed by a PHOENICS-to-VR converter.
The consequence is that, as has been explained in section 4, when the user looks at his world again, he finds that it is enriched with information concerning temperatures, pressures, fluid compositions and velocities at all points.
Of course, it is not essential for the user to examine all this information, or even any of it.
Indeed, the conventional RESULT file may already contain the two or three pieces on information in which the user is interested at the time, for example the answer to the question:
Is the maximum permissible temperature exceeded anywhere?
When PHOENICS is installed, a directory PHOENICS is created and all of the files for PHOENICS are placed into sub-directories according to the file type, and to which PHOENICS program(s) it applies.
The directory structure for files relating to PHOENICS-VR is:
                   /PHOENICS----D_PHOEVR----D_WINDF
                               |--D_SATELL----D_WINDF
                                          |-D_SPP----D_GEOM
                                                   |-D_LIBS
The following panels describe this structure in more detail
D_PHOEVR
This directory contains files for the VR-Commander: the executable, the help files and run scripts.
D_PHOEVR/D_WIN
This contains the equivalent files for the Windows version of the VR-Commander.
D_SATELL
The VR Editor and Results Viewer are both parts of the SATELLITE program, which is in this directory.
D_SATELL/D_WIN
This contains the equivalent files for the Windows version of SATELLITE.
D_SATELL/D_SPP/D_GEOM
The VR-image (ie "clip-art") files are stored here, divided into sub-directories according to the object type.
D_SATELL/D_SPP/D_LIBS
VR library cases are stored here, divided into sub-directories according to the SPP name.
The VR Commander gives the user complete control over the VR Editor, EARTH and the VR Results Viewer and allows users to load, use and save their cases.
There are several ways to start the VR Commander, namely:
Once the VR Commander has been started, the current working directory is displayed in the bottom left corner of the screen. A bar across the top of the screen controls the various VR Commander functions and options.
When the VR Commander is in use, the Q1 files that the user creates are stored according to PROJECT and CASE names.
Each PROJECT is a directory with the project name in the working directory. In the project directory may be stored files for any number of CASES.
For example, a user may create a case called 'rig1' as part of a project called 'offshore'. In this example, the Q1 file would be saved as RIG1.Q1 in a directory called OFFSHORE.
Any subsequent PHI, RESULT or PATGEO files would be saved in the same directory with the names RIG1.PHI, RIG1.RES and RIG1.PHI respectively.
The user creates, opens and saves cases using the various options revealed by clicking on the FILE button.
When a case is loaded, the relevant files are copied to the working directory under the usual PHOENICS filenames (Q1, PHI, etc.).
The other main functions of the VR Commander are to:
The VR Editor allows the user to create and edit geometries and to set other parameters for the simulation.
There are three ways to start the VR Editor:
The VR Editor provides a view of the geometry, with control buttons along the bottom and right of the screen. The main controls are:
To quit the VR Editor, click on the Exit button, remembering to save any changes to the geometry.
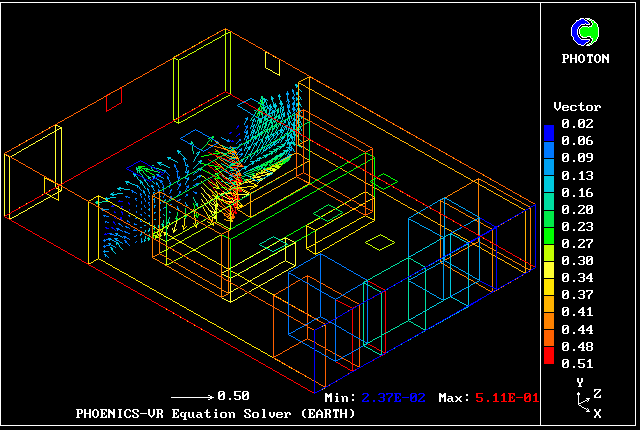
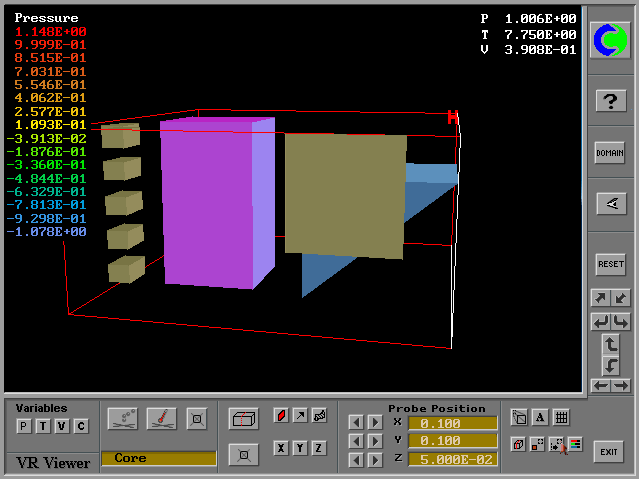
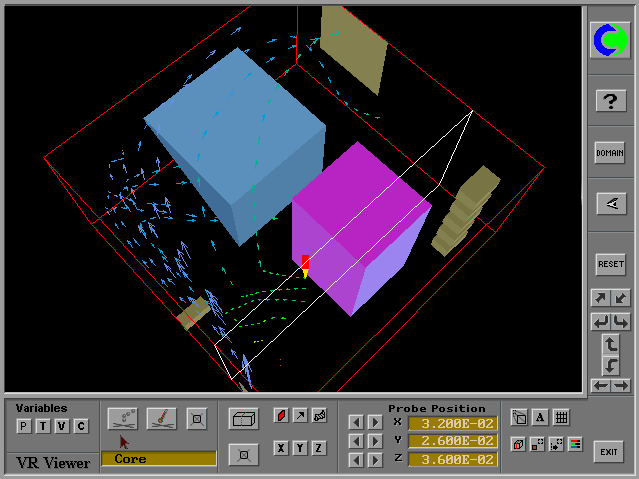
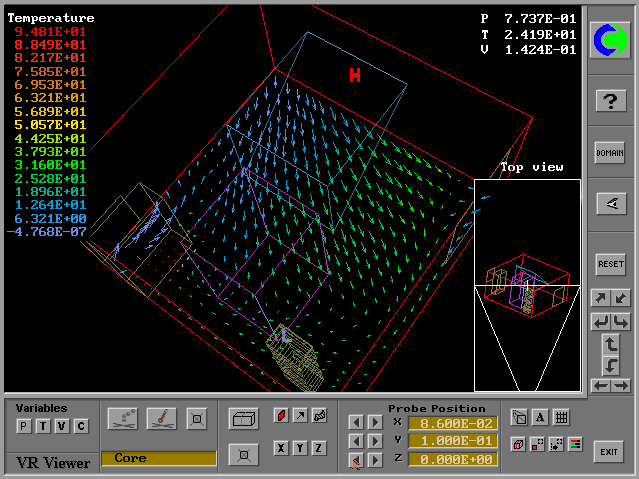
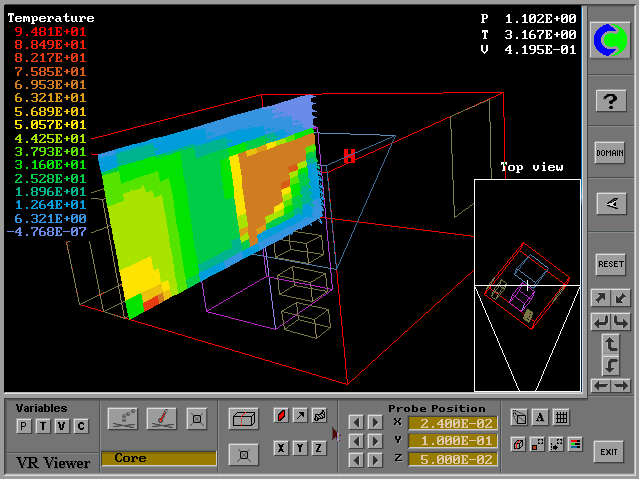
The VR Results Viewer allows the user to review the results of a simulation, providing vectors, contours, streamlines and isosurfaces.
To start the VR Results Viewer, click on the 'VR Viewer' button in the VR Commander.
At first glance, the Results Viewer looks identical to the VR Editor. However, there are some differences in the viewing window:
Vectors, contours and iso-surfaces are plotted using the three buttons above the plane controls. All are coloured by refernce to the current variable; and the value used for iso-surfaces is the value at the probe position.
Moving the probe will cause vectors, contours and isosurfaces to be redrawn. Streamlines are also plotted from the current probe position, but moving the probe does not redraw the streamlines. This allows multiple streamlines to be created.
Slices can also be taken. This causes the current probe position and plane to be stored. When the animation (A) button is pressed, the view cycles through all of the stored slices, plotting vectors, contours or isosurfaces (or any combination) at each slice. This can be used to automatically plot successive planes of vectors, or to plot isosurfaces of an expanding flamefront.
Other controls are similar to those in the VR Editor for changing the viewing angle and other option; full details can be found by clicking on the Help button.
To quit the Results Viewer, click on the Exit button.
There is a "generic" PHOENICS-VR interface, which comprises the basic software tool-set, the format for the on-screen display, and the "control knobs" accessible to the user; and there are special- purpose versions of PHOENICS-VR, designed for specific sectors of industry or science.
CHAM is therefore developing a family of sector-specific interfaces, partly in connection with the MICA project.
The members of the family differ in respect of:-
Ten sectors are currently receiving attention, namely:
At the same time, CHAM is treating certain other industrial sectors in the same way, using its own funding. These are:
Blast and missile-projection (included in EXPLOITS, but not strictly funded by MICA) Electronics cooling (with the special-purpose program: HOTBOX) Oil-slick movement (with the special-purpose program: ROSA)
Other products are being planned.
CHAM's view is that an increasing proportion of the CFD needs of industry and the environment will be met in the MICA manner.
CHAM sees its Virtual-Reality interface as opening the benefits of computer simulation to all who need them, including educators, the medical profession, safety analysts and many others.
The easier it becomes for its users to set up flow-simulation tasks, the greater are the demands which are made on:-
It is for this reason that the MICA project is paying much attention to the meeting of all these demands.
wbs